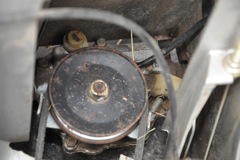
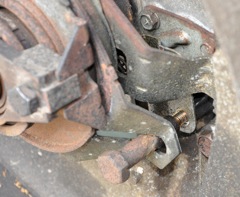
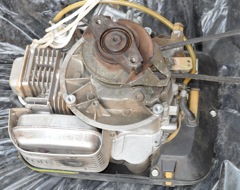
This shows the transmission side of the auxilliary drive belt, with the drive enable nylon lever and return spring. Not directly part of this repair, but many people can't figure out how to get the belt off. Easiest way, I'm now convinced is to simply loosen the 4 engine mount bolts 1/2 way and slide the belt over the entire clutch assembly on the drive shaft.
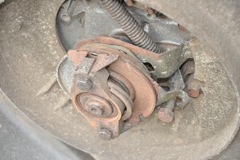
After removing the mower blades, this is what's left. The two blade retaining bolts are still in this picture and were later removed. One arm of the clutch is captured by the stand-up bolt in the lower right. The other arm is connected to the big spring attempting to swing the arm upward. To spin the blad, the spring arm is pulled downward in this picture.
The center shaft is an 8 mm hex wrench. After trapping the piston with rope (see below), I tapped on the wrench with a hammer a bit, then used a 1 foot extension pipe on the allen wrench and it backed right out. Notice the bolt doesn't come all the way out. It's retained in the clutch with a snap ring or something (I don't know). Just listen as you separate threads and you'll hear a click sound as the last thread is hopped over each turn. Then just pull the entire assembly off the shaft.
This is the blade engage lever and pull cable seen from the top side. This needs to be disconnected to wiggle the clutch off the engine shaft. For me, it turned out to be easier to disconnect this and the throttle cable and totally separate the engine and clutch from the mower deck.
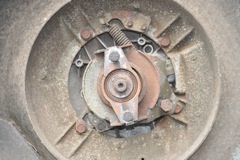
Removing the capture bolt that holds one arm of the clutch from moving. The bolt looks big, but it really has smaller threads and was not too tight.
To keep the crankshaft from rotating while pulling off the center shaft allen bolt, I lowered the piston all the way down, stuffed nylon rope into the cylinder and then rotated the shaft until the piston squished all the rope and couldn't move any more.
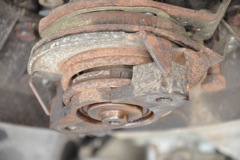
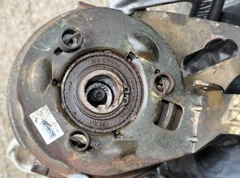
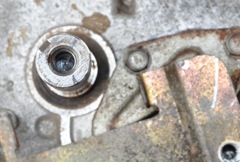
Bad news. See the center of the picture. The mower blade yoke is cracked. Not only did the crankshaft bend, but the blade yoke is 1/2 broke.
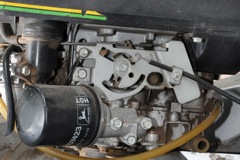
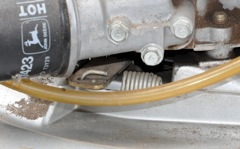
I wanted more working room so I decided to remove all 4 engine bolts rather than loosen them and just pull the engine off the frame. This throttle cable was the only thing other than the blade engage cable.
I tilted the mower up on it's back wheels and layed a thick trash bag suffed with straw next to the mower. Then just pulled the last mount bolt as I held the engine and gently lowered it onto the soft work space.
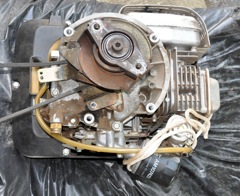
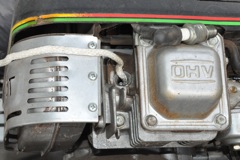
Nothing was removed from the engine (just two cables disconnected) and now there's a LOT more space to work.
Engine side of the clutch assembly.
Crankshft as I found it. Wiped off the WD-40 and rust with a cloth. I removed the pully with a 1/8" allen wrench (none of the metrics fit well). Don't loose the small small rectangle of metal key that will fall off, too.
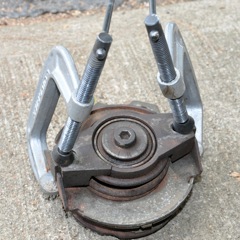
I was concerned that as I pulled the allen bolt out of the crank, the strong clutch springs would explode all the parts at me. So.. I had C-clamps on it. However, it turns out the bolt is somehow captured in the assembly and can be loosened from the crank but is still captured in the clutch assembly.
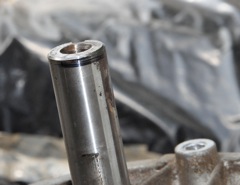
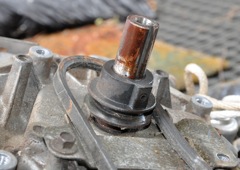
The crank is bent. Hammer on which side? I spun it around with a black marker in my other hand and let the marker color the protruding side. See the black line near the top of the shaft in this picture?
I marked the ends of the black line on the end of the shaft and then hammered in the middle. Turns out I didn't have any effect. I didn't want to hit it too hard, concerned about breaking the oil seal, the bearings, or the engine case itself.